Please see below, pictures and instructions on strokes. Click on the + sign for more instruction.
Strokes
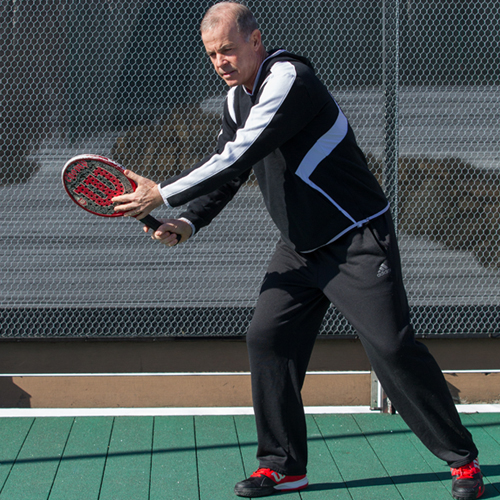
The Forehand Drive
The Forehand Drive
From ready position:
- Rotate shoulders 90° (paddle goes back simultaneously)
- Keep back swing compact Paddle should be back before ball bounces
- Take many small adjustment steps
- Maintain balance and control
The Forehand Drive 2
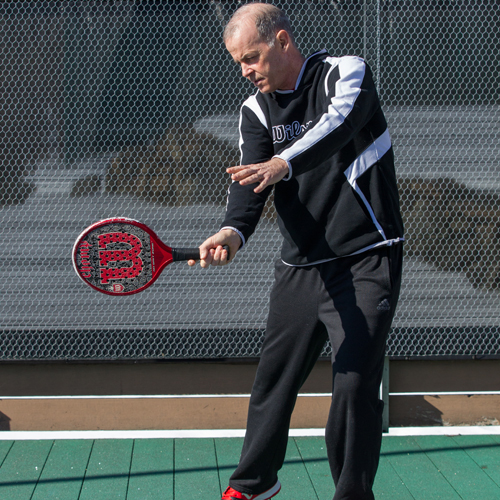
- Forward swing motion should begin once the ball bounces
- Contact point is in front between waist and shoulder high
- Swing path is low to high brushing up to impart topspin
- Follow through over your opposite shoulder
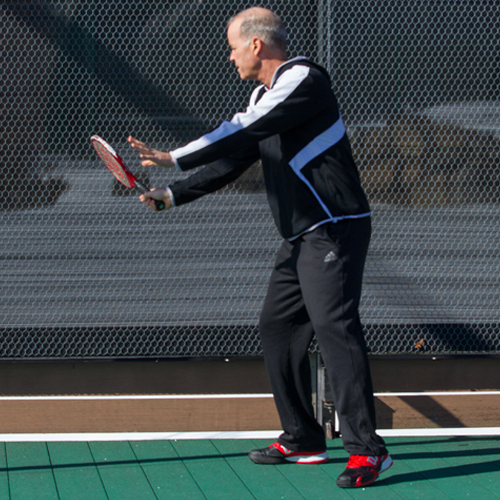
Drive Off Screen
Drive Off Screen
- Shoulders turned
- Move back to back screen
- Weight on back foot
Drive off section 2
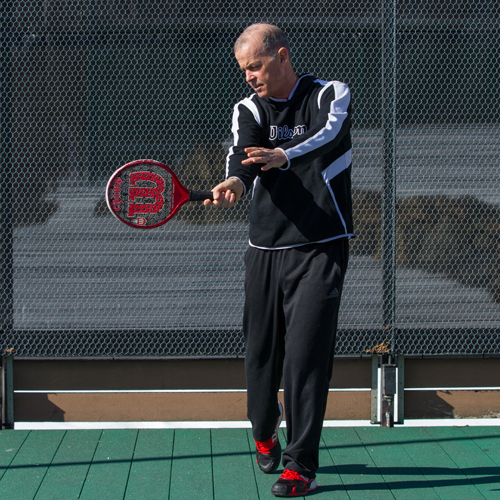
- Contact point ahead of left foot between waist and shoulders
- Small adjustment steps
- Moving with the ball
- Weight on front foot
- Stepping into the green
Drive off section 3
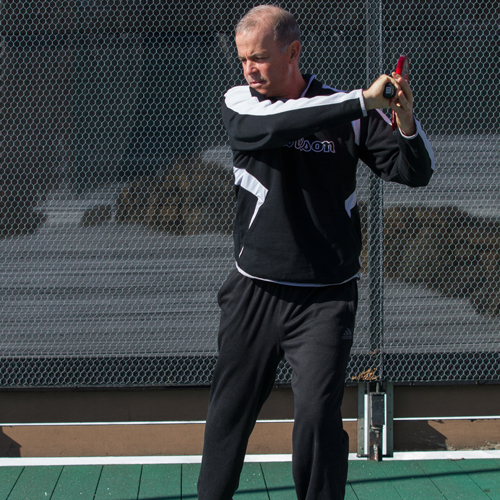
- Follow through over left shoulder
- Hips and shoulders fully rotated
- Belly button facing the net
- Chin on right shoulder
Backhand Lob
Backhand Lob
From the ready position:
- Rotate shoulder’s 90° (paddle goes back and low simultaneously) thumb of hitting hand goes down to opposite thigh with paddle face open.
- Take small adjustment steps
Backhand Lob 2
- Maintain balance and control, bend your knees
- Swing motion should begin once the ball bounces
- Contact point is in front and waist
- Swing path is low to high, focus is on hitting the bottom of the ball forward and up
- Aim to get the peak of the lob on your side of the net, to ensure that your lob will stay in.
- Follow through above head
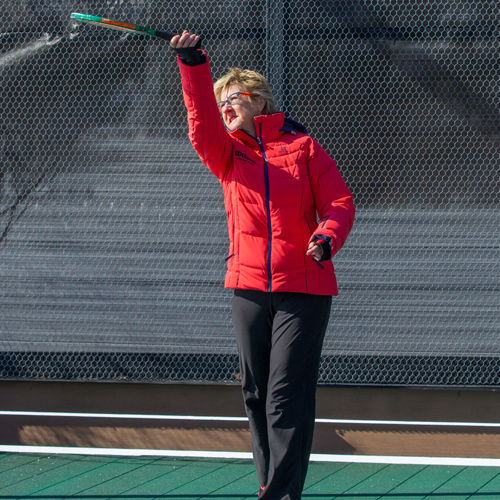
Forehand Lob
Forehand Lob Ready Position
From the ready position:
- Rotate shoulder’s 90° (paddle goes back and low simultaneously)
- Take small adjustment steps
Forehand Lob 2

- Maintain balance and control, bend your knees
- Swing motion should begin once the ball bounces
- Contact point is in front and waist high
Forehand Lob 3

- Swing path is low to high, focus is on hitting the bottom of the ball forward and up
- Aim to get the peak of the lob on your side of the net, to ensure that your lob will stay in.
- Follow through above head
Overhead
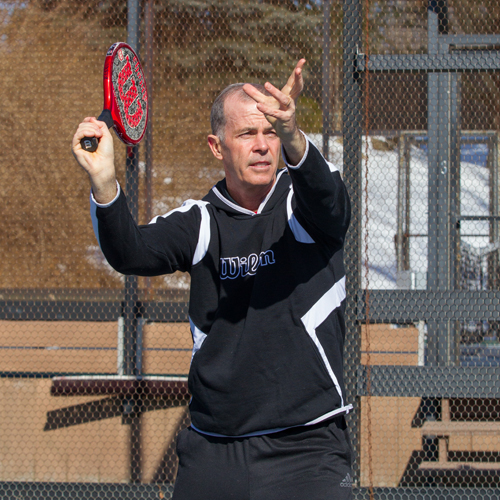
Overhead
Attack overheads are the shot of choice to hit on short lobs, meaning your feet are inside the service line. Your target is your opponents backhand screen. Do not over hit, you should try to hit just hard enough so the ball hits the side screen first and just reaches the back screen. Remember this is not a “winner” so don’t stand and watch, get into position and be ready for your next shot.
for attack overhead into ad court side back screen, aim like shooting a bow and arrow• exaggerate left shoulder turn
Overhead 2
- from ready position
- turn shoulders
- both arms go up-compact motion
- right foot drops back, completing the turn (left foot if left handed)
- take many small adjustment steps-staying sideways
Overhead 3
- position body behind ball
- point of contact in front of hitting shoulder
- weight moves forward
- move paddle forward and through on line with target
- complete follow through to opposite thigh
- return quickly to ready position
Serve
Serve
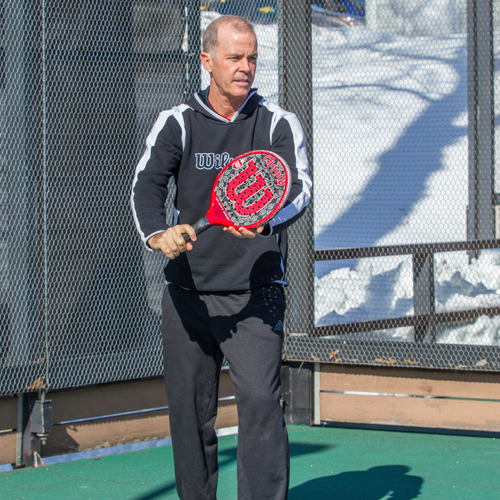
From the ready position:
- sideways to the net
- continental grip
- balance and relaxed
Serve 2
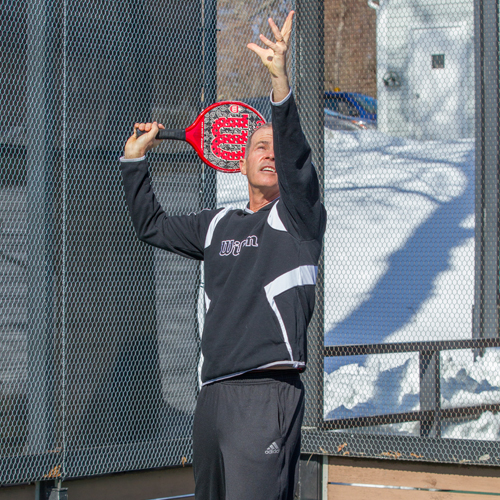
- ball toss in front of hitting shoulder and forward into the court
- back swing motion compact
- balance goes to front leg, knees are flexed
Serve 3
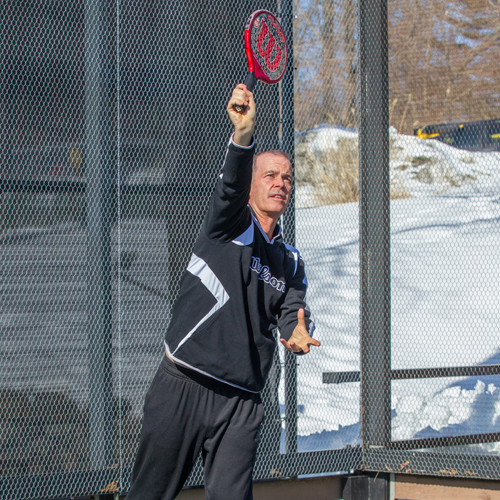
- toss should be to point of contact-full extension
- paddle moves up and forward through ball toward target
- body rotates forward into court, first step into court with back leg
Serve 4
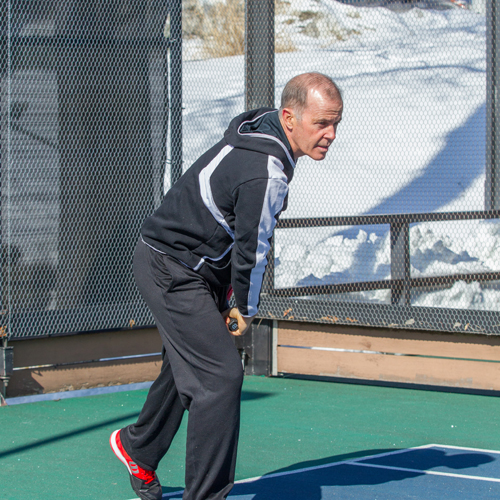
- continue forward with follow through and body moving toward net and center of court
- prepare for first volley, stay balanced
Volley
Volley
- Ready position
- Paddle centered to her body
- Shoulders square to the net
- Knees bent
- Quiet, steady hands
- Bring it on!
Volley 2
- Gerri squeezes the grip just before contact
- She volleys this ball if it is not hit with much pace
- “Shoulder high, let it fly”
Volley 3
- Paddle head above her right hand
- Right hand stays relaxed in ready position
- Left hand rules
- No turning or stepping needed
- Paddle only travels 4 inches after impact
- Deflect the ball, don’t attack it
Volley 4
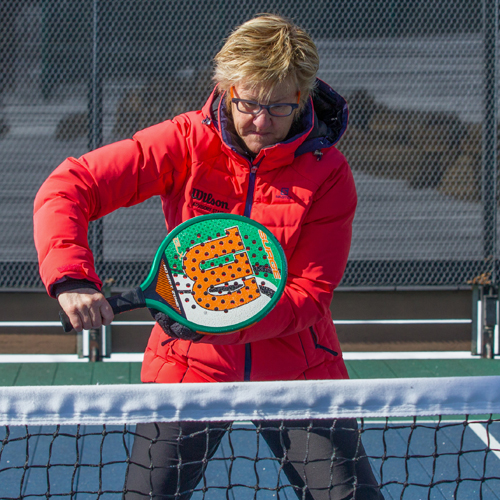
- Backhand volleys have a wide range
- Gerri can volley the ball from her left hip out to her right hip
- She will step out to her right to keep her paddle centered to her body
Volley 5
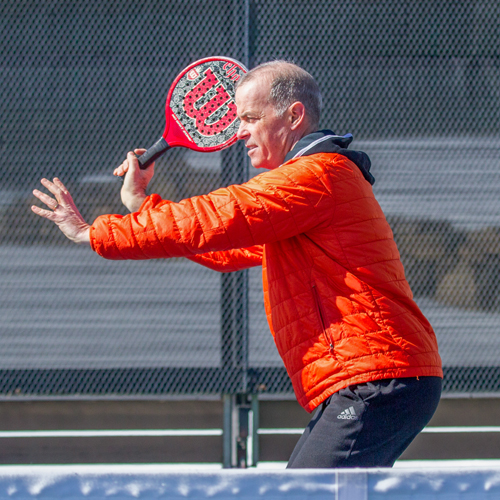
- Gerri will volley this ball with her forehand if it is traveling slowly
- Be careful. Forehand volleys can pop long!
Slash
Slash 1
- Shoulders turned beyond 90°
- Continental grip
- Left palm faces side screen
Slash 2
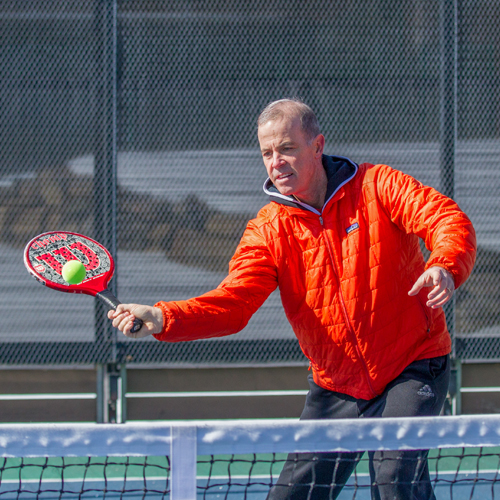
- Knees bent
- Contact point shoulder height
- Right thumb points toward right ear
- Wrist remains cocked at contact point
Slash 3
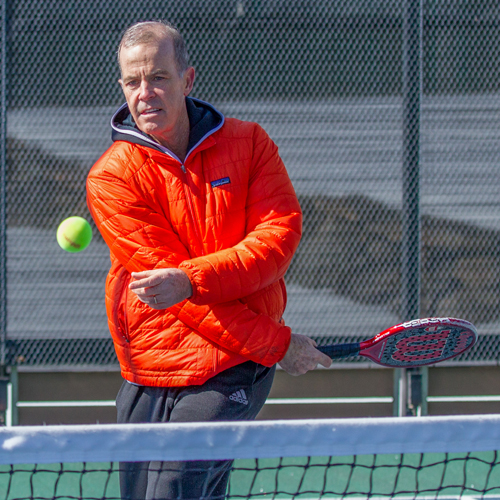
- Hips and shoulders rotate
- Stroke shaped like a banana
- Aiming long and low toward the center of the court
- Follow through is out and to the left
Backhand Screen
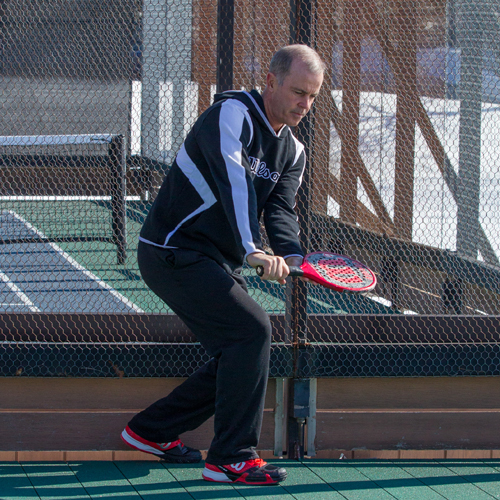
Backhand Screen
- Shoulders turned and paddle set
- Move close to the back screen
- Paddle rests on left palm at waist
Continental Grip
Open paddle face
Backhand Screen 2
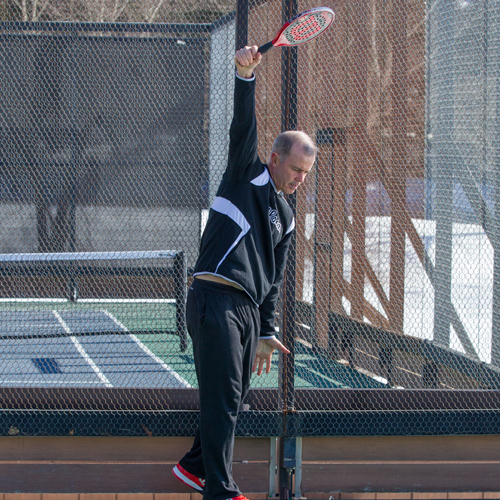
- Contact point at waist
- Lift comes from big muscles (legs)
Backhand Screen 3

- Sue follows through over her head
- Paddle stays on left side of Sue’s body
- Firm wrist
- Left arm points down
- Weight on front foot
- Aiming as high as the lights
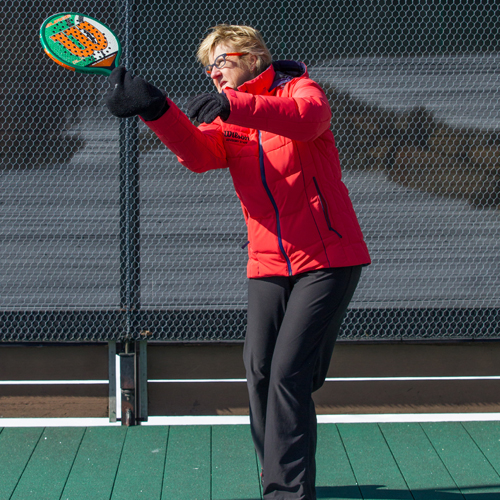
Forehand Block
Forehand Block 1
- Rotate shoulders
- Taking the paddle back at shoulder high
- Swing motion should begin once the ball bounces
- The rhythm is bounce hit
- Contact point is chest high in front of front foot
- Paddle face is open
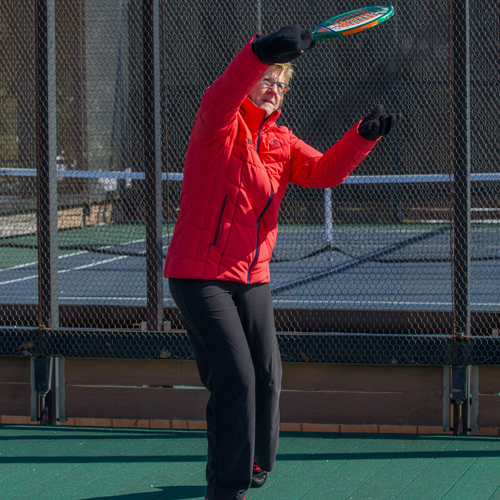
Backhand Block
Backhand Block 1
- Rotate shoulders
- Taking the paddle back at shoulder high
- Swing motion should begin once the ball bounces
- The rhythm is bounce hit
- Contact point is chest high in front of front foot
- Paddle face is open
Drop Shot
Drop Shot
- Opponent either lobs short and low or drives from too deep-big mistake!
- Move extremely close to the net.
- Paddle head must be above net level.
- Loosen your grip at impact.
- Assume the opponent will get it and volley behind them.
- Conceal your grin.
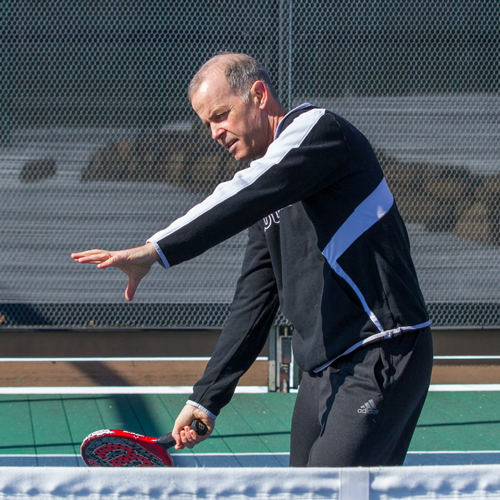
Roller
Roller 1
- Turn and close the paddle face
- Take a minimal back swing
Roller 2
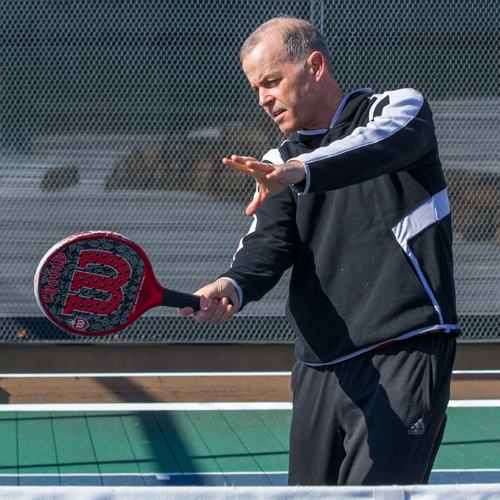
- Strike ball on right side (4 o’clock)
- Roll your wrist over the top of the ball
- Aim for the corner of the deuce court service box
Roller 3
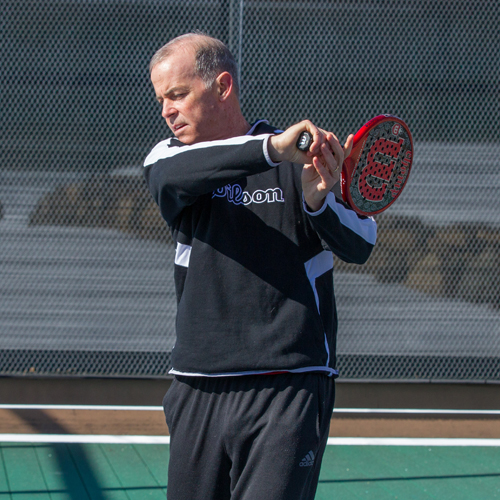
- Follow through across your body
- Right thumb points downward on finish
- Ball should hit the 1st post on the side screen 1 1/2 feet above snowboard, and die before the back screen
- Vary your spots
- Aim at the nick, at the body of your opponent, or down the middle
Slash Drop
Slash Drop 1
- Shoulders turned
- Left arm across your body
- Eastern backhand grip
- Index finger spread
- Paddle head up
- Contact point is out to the right
- Right and left wrists stay near
Slash Drop 2
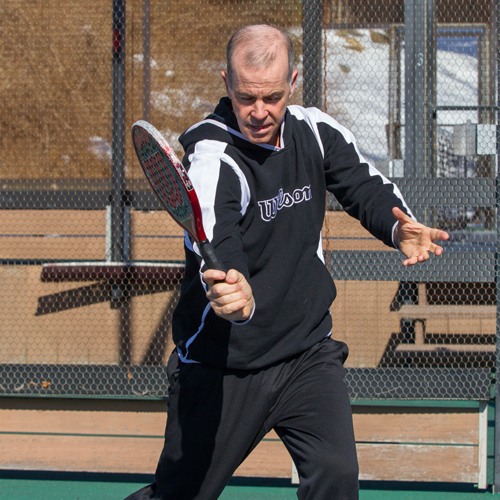
- Lighten your grip
- Strike the ball at 3 o’clock
Slash Drop 3
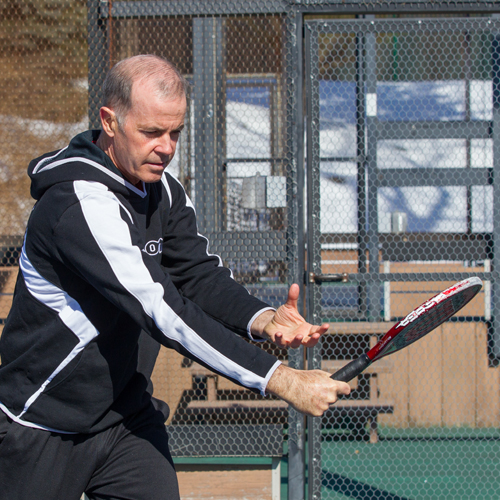
- Paddle face slides down the side of the ball and curls around the front
- Palm faces toward you
- Weight shifts to back foot at impact
- Ball breaks left and dies
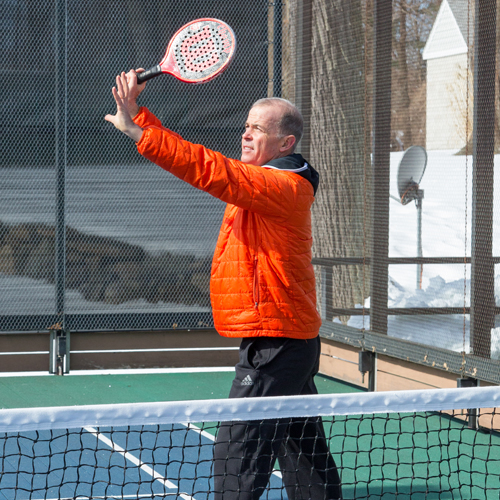
3rd Panel Slam
Panel Slam 1
- A very exciting shot that creates movement.
- Begins with a short lob from the deuce court.
- Player on the left takes a big hip and shoulder turn
- Your back is almost to the net.
Panel Slam 2
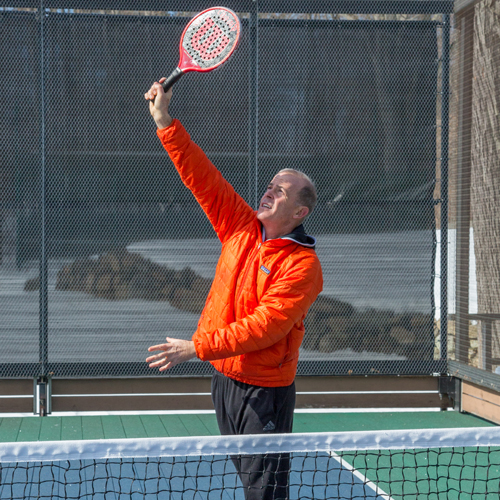
- Contact point is at full extension
- Pronate at contact, turning your hitting thumb inward.
Panel Slam 3
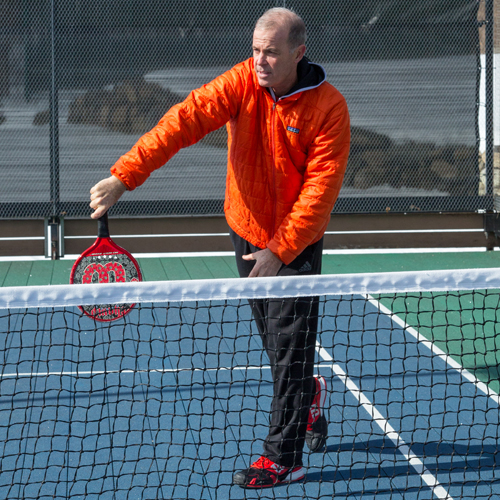
- Snap your wrist and accelerate through contact point.
- Follow through on the same side of your body.
Panel Slam 4
- The receiver of the 3rd panel slam.
Panel Slam 5
- The sharp angle of this shot pushes the opponent into the middle of the court.
Panel Slam 6
- The follow up shot is an off speed back side overhead. This makes the opponent travel the farthest.